
Did you know that in addition to giving you an overview of your invoices and their status, invoicely also helps you keep track of your expenses? In oder to do this, you need to create bills in invoicely. This way, all your expenses will feature in your monthly and yearly reports and graphs, giving you an accurate picture of the status of your finances.
Creating a bill with invoicely only takes a couple of minutes. Here's a step-by-step guide on how to do it:
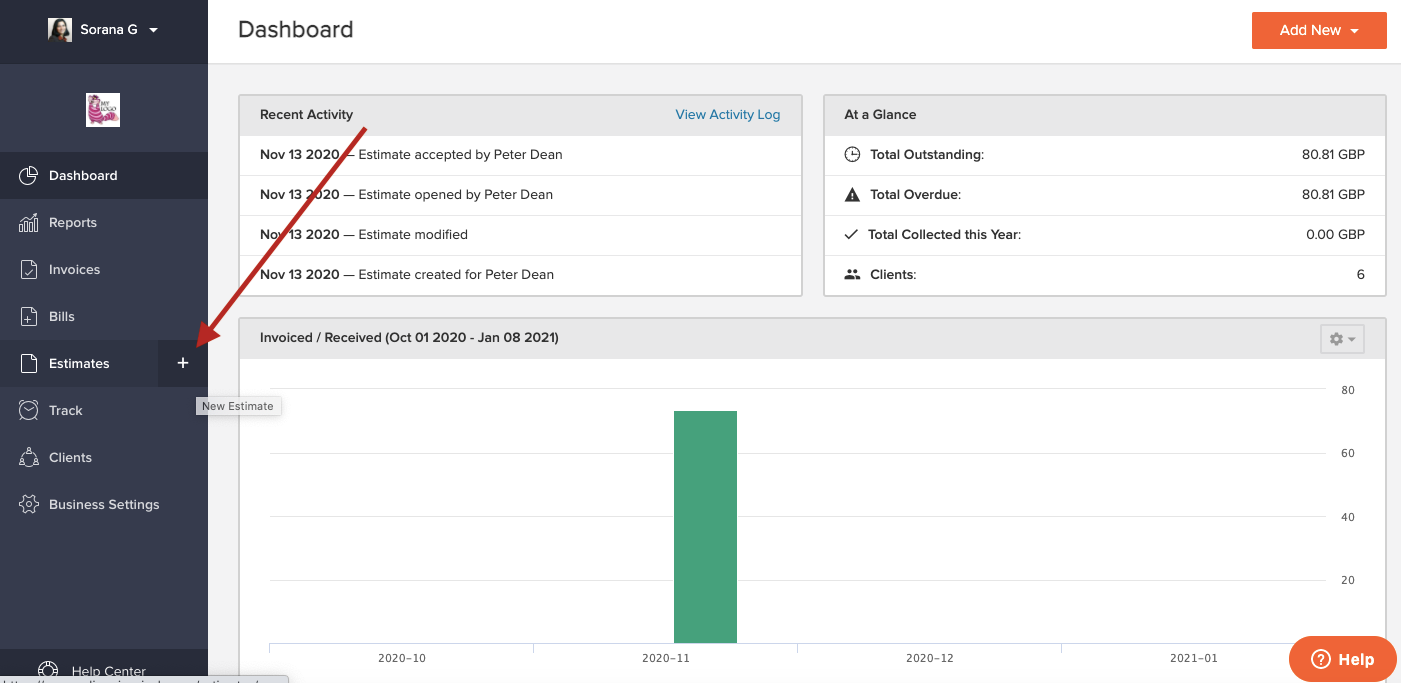
Let's say your company car broke down and you paid $264 for its repair. Now you want to create a bill for this expense, in order to have a record of it. From your invoicely dashboard, click on the plus sign next to the "Bills" link in the lefthand menu. (it appears when you hover over the "Bills" link, see image below).
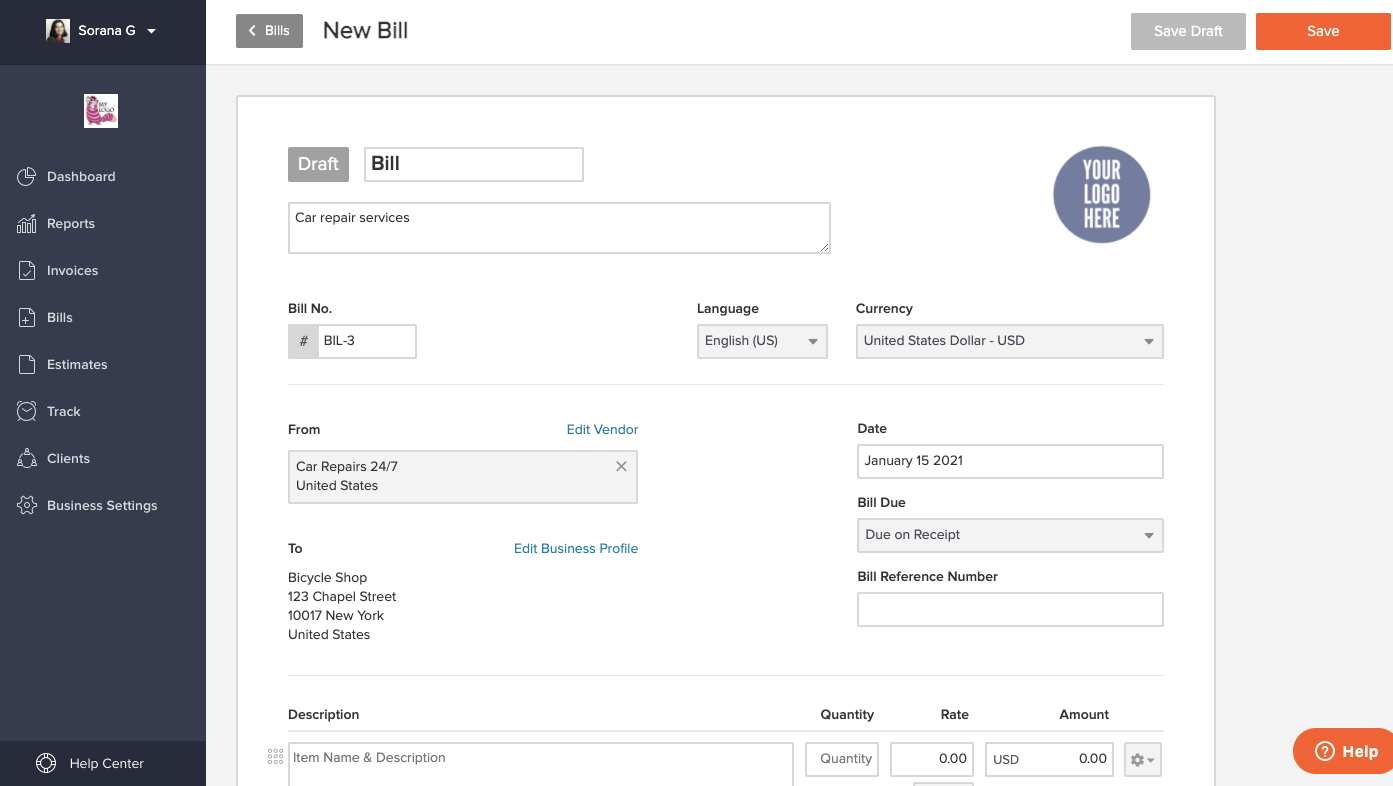
Clicking on the plus sign opens a new bill page, where you can now fill in the data related to your expense, like date, payee name and address, currency, etc. like in the screenshot below. The number of the bill is created automatically, in order to have consecutive numbers without gaps, but you can change it if you need to. The date of the bill is the date when you made the expense.
If you have already paid the bill you can fill in the "bill due" box by choosing "due on receipt"
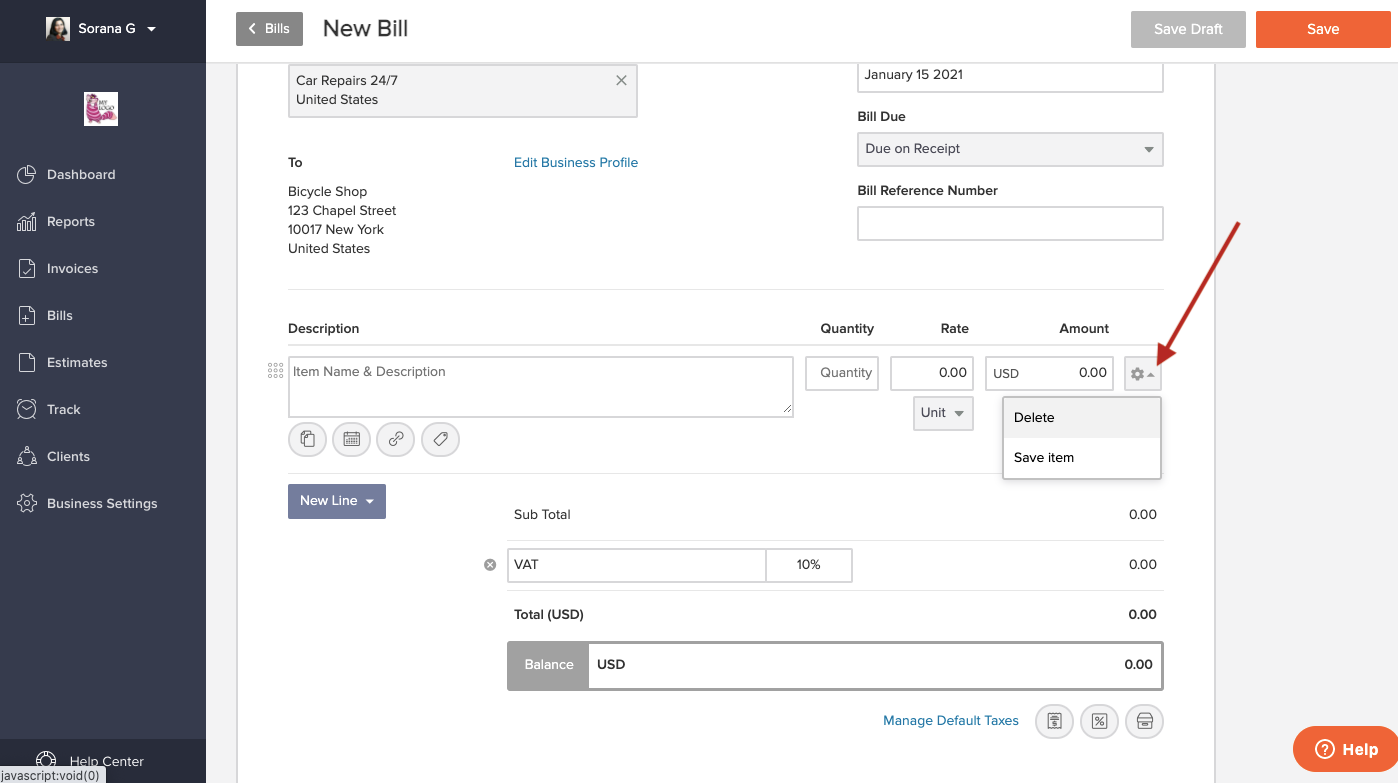
The default description in the bill template is for purchased items, so if you're creating a bill for a service, just delete the default item description like in the screenshot below by clicking on the corresponding gear icon on the righthand side and then on "delete".
After that, click on "New line" on the righthand side and choose "Expense".
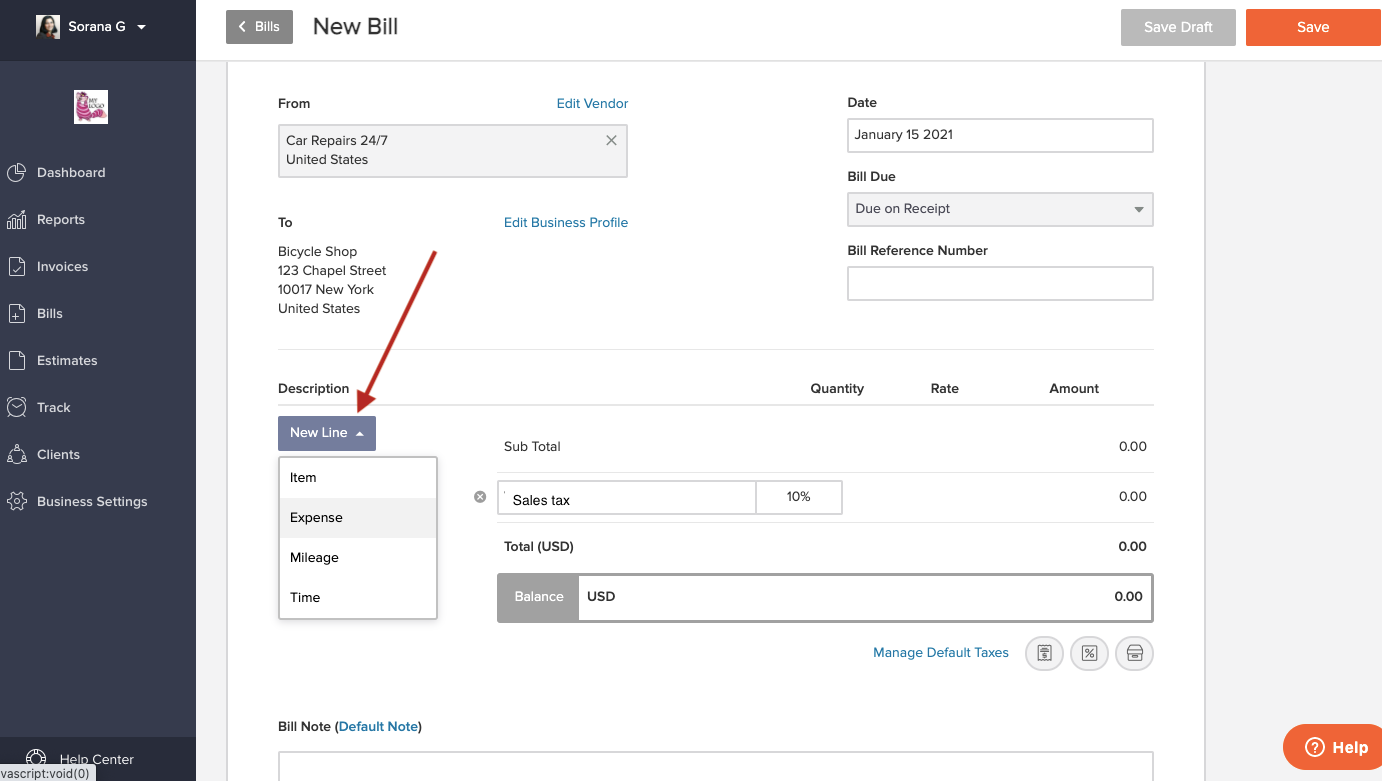
A new "expense" line will be created, where you can now write the name of the service, in our case "car repair services" and the price minus the sales tax (also called VAT, or value-added tax), in our case $240. The sales tax will be calculated automatically after you enter the corresponding sales tax rate (if applicable) in the next box.
If needed, you can add any other taxes, discounts or shipping costs incurred by using the corresponding buttons under the bill balance on the righthand side. You can find a guide on how to use these buttons here.
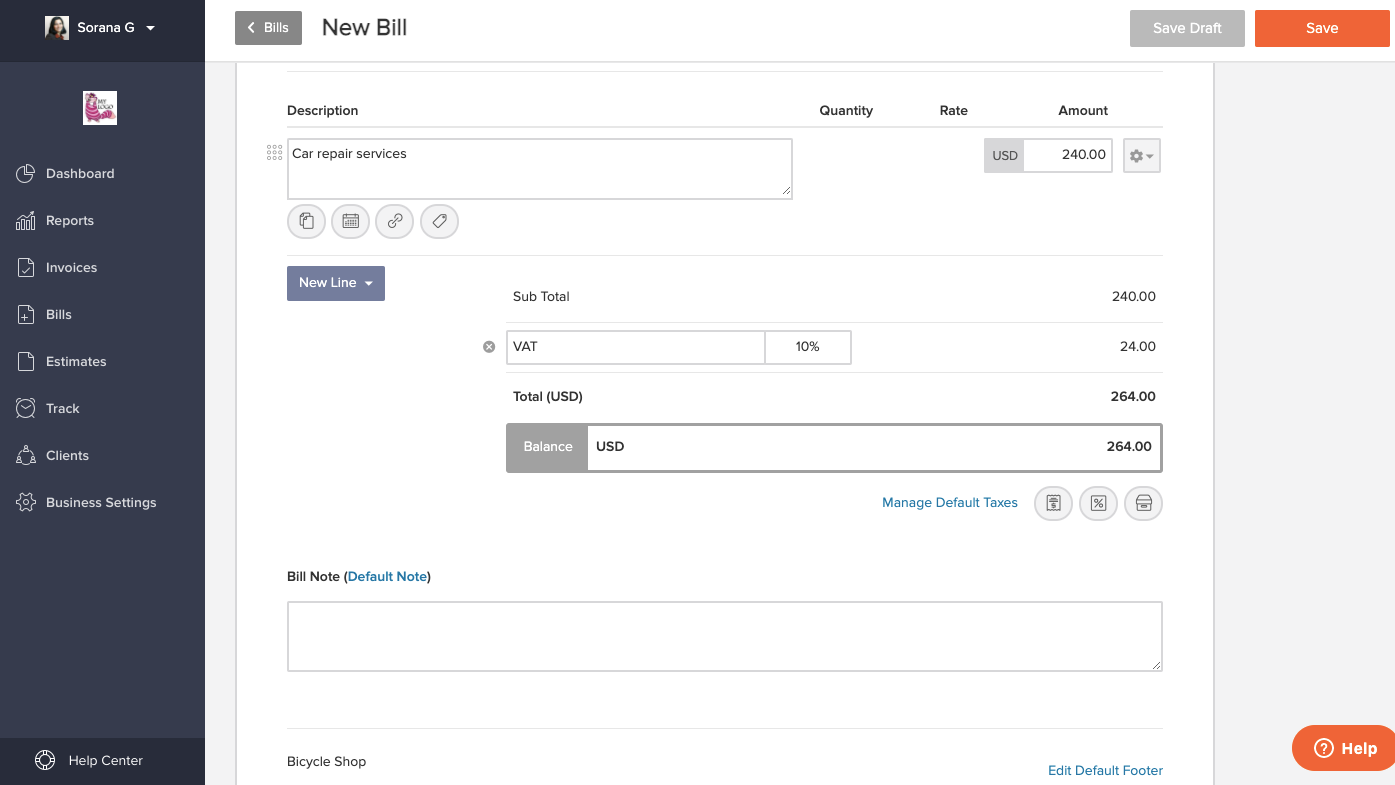
And that's it, your new bill is ready! Now you can save it with the help of the orange "Save" button in the upper right corner of the bill.
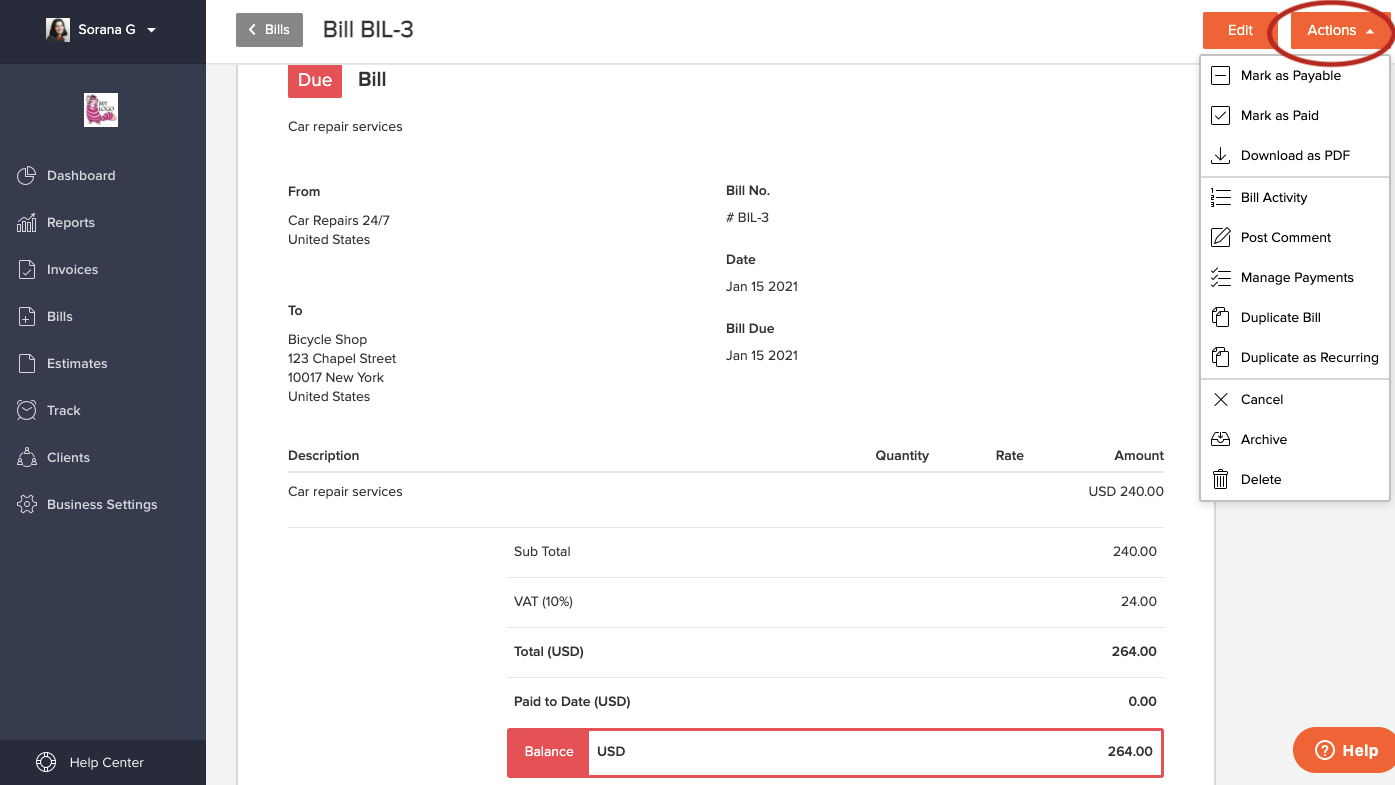
If you have already paid the bill, don't forget to mark it as paid before closing it. If you click on the orange "Actions" button in the upper righthand corner (this button appears after you save the bill), a dropdown menu appears with different actions you can do with your bill, such as saving it as PDF, marking it as paid, archiving it, deleting it etc. Choose "Mark as paid" and you're you're done. You can come back to your bill any time and edit it if necessary.
Not an invoicely user yet? Pop up to our registration page and sign up for a free basic account, it only takes a couple of minutes until you can write your first invoice with invoicely!