
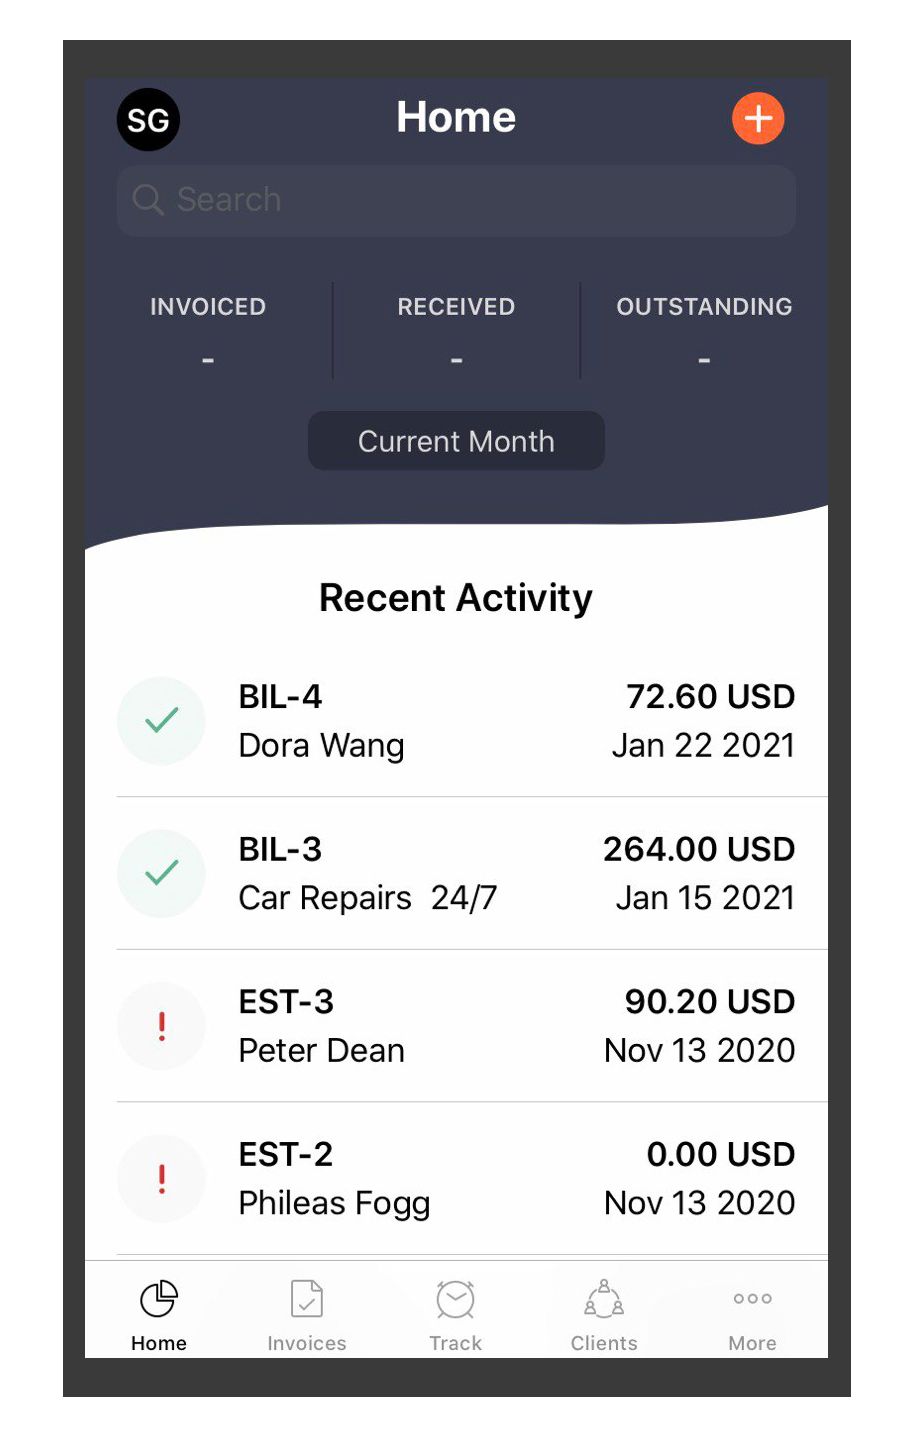
The new invoicely mobile app makes writing an invoice while on the go even easier than before.
Here's how it works:
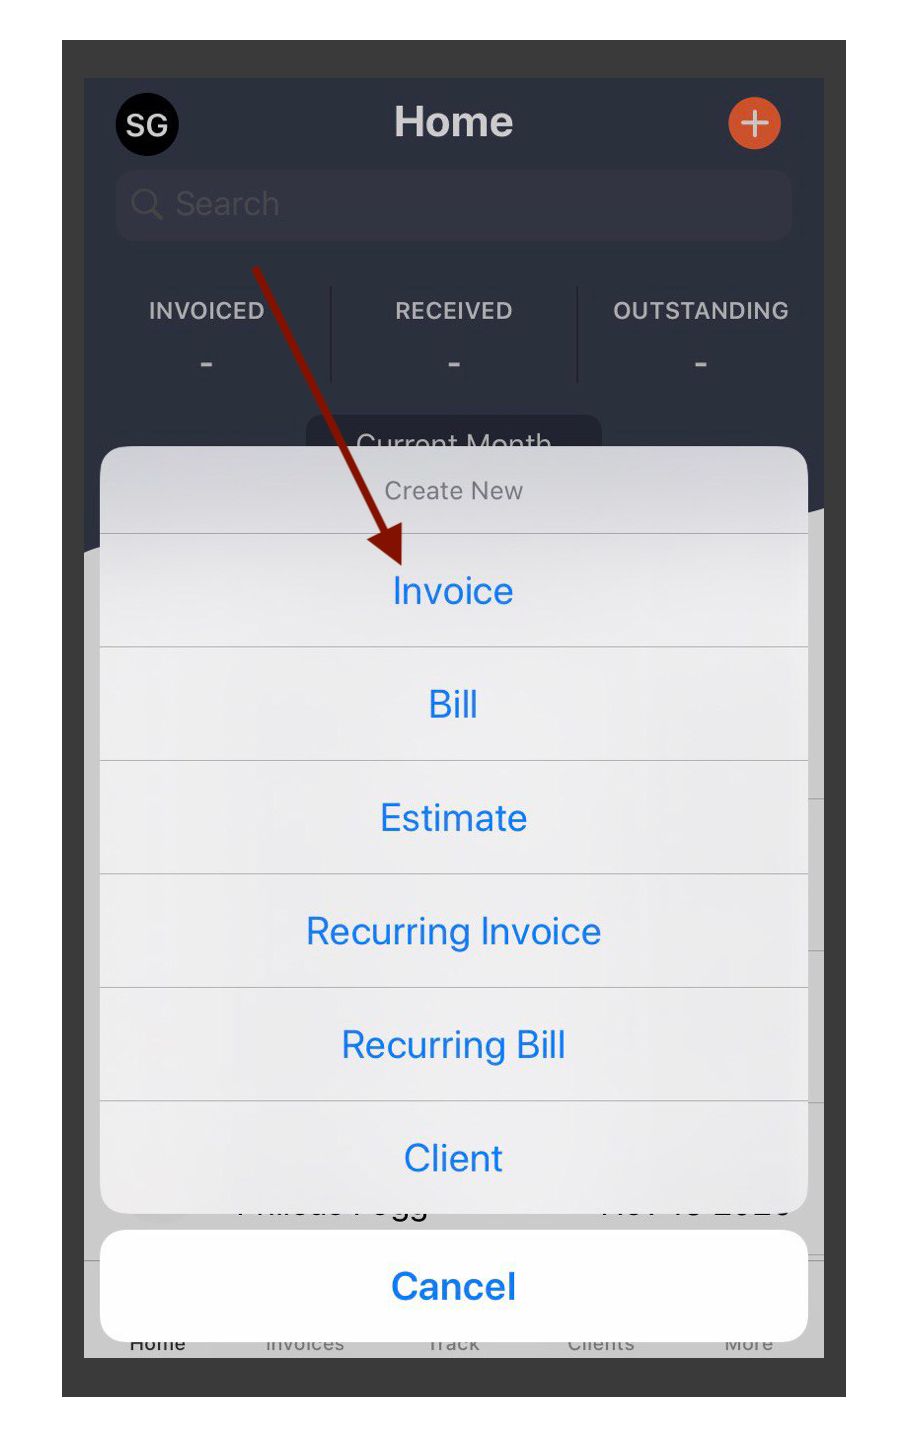
Let's say you've just sold a mountain bike and want to issue an invoice for it.
Open the app and tap on the orange plus sign in the upper right corner.
In the menu that appears, tap "Invoice". This will open a new invoice for you to fill in.
Start by giving your new invoice a name by tapping inside the "Title" box and typing the chosen name. It's a compulsory field, so just name it "Invoice" if you don't want to give it any other name. Next, type a description of the invoice (optional).
The invoice number will be given automatically by the app in order to have consecutively numbered invoices, without gaps, but if you need to change it for whatever reason, you can do it.
Next, you can choose the language and currency of the invoice. The app automatically chooses he current date as invoice date, but you can choose another date if you wish, just tap in the date box and scroll until you find the desired date.
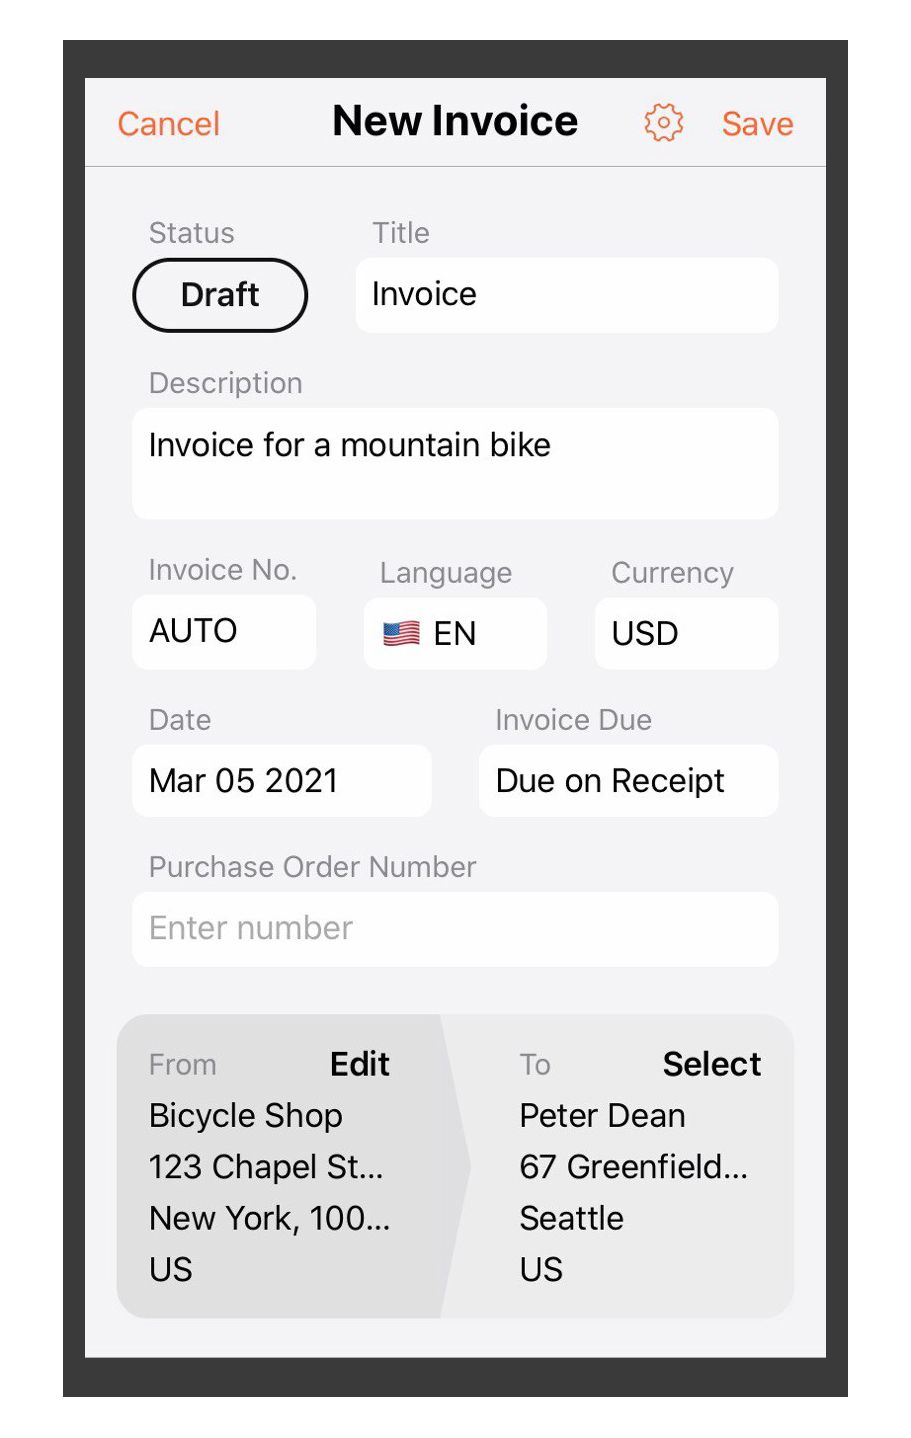
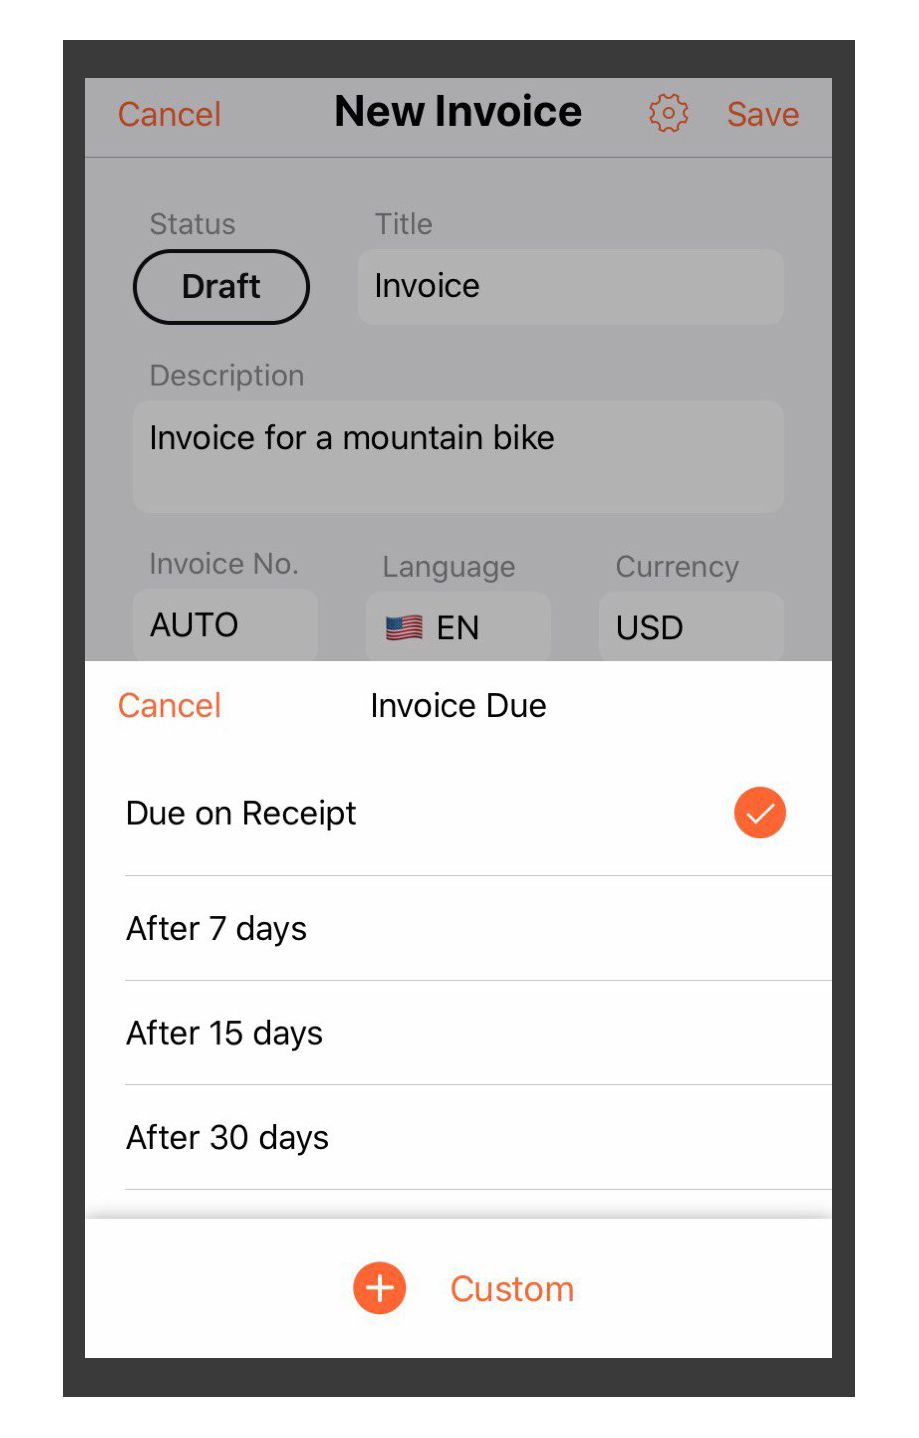
"Due on receipt" is the default due date already entered in the invoice, however, by tapping on it, you can change it to "after 7 days" or 15, 30, 60 days or, if you don't fancy any of these possibilities, just choose " "Custom", which allows you to select a specific date.
After this, you can enter the purchase order number (optional).
Your company name and address, as well as those of your client come next. The fields with your name and address are pre-populated, but you can edit the data if you need to change anything. In order to enter the client data, tap "Select" in the "To" box on the right to select the client from your client database.
If it's a new client who isn't in your database yet, tap "Select" and then in the "Select client" screen, tap the orange plus sign in the upper right corner in order to enter and save the details of your new client.

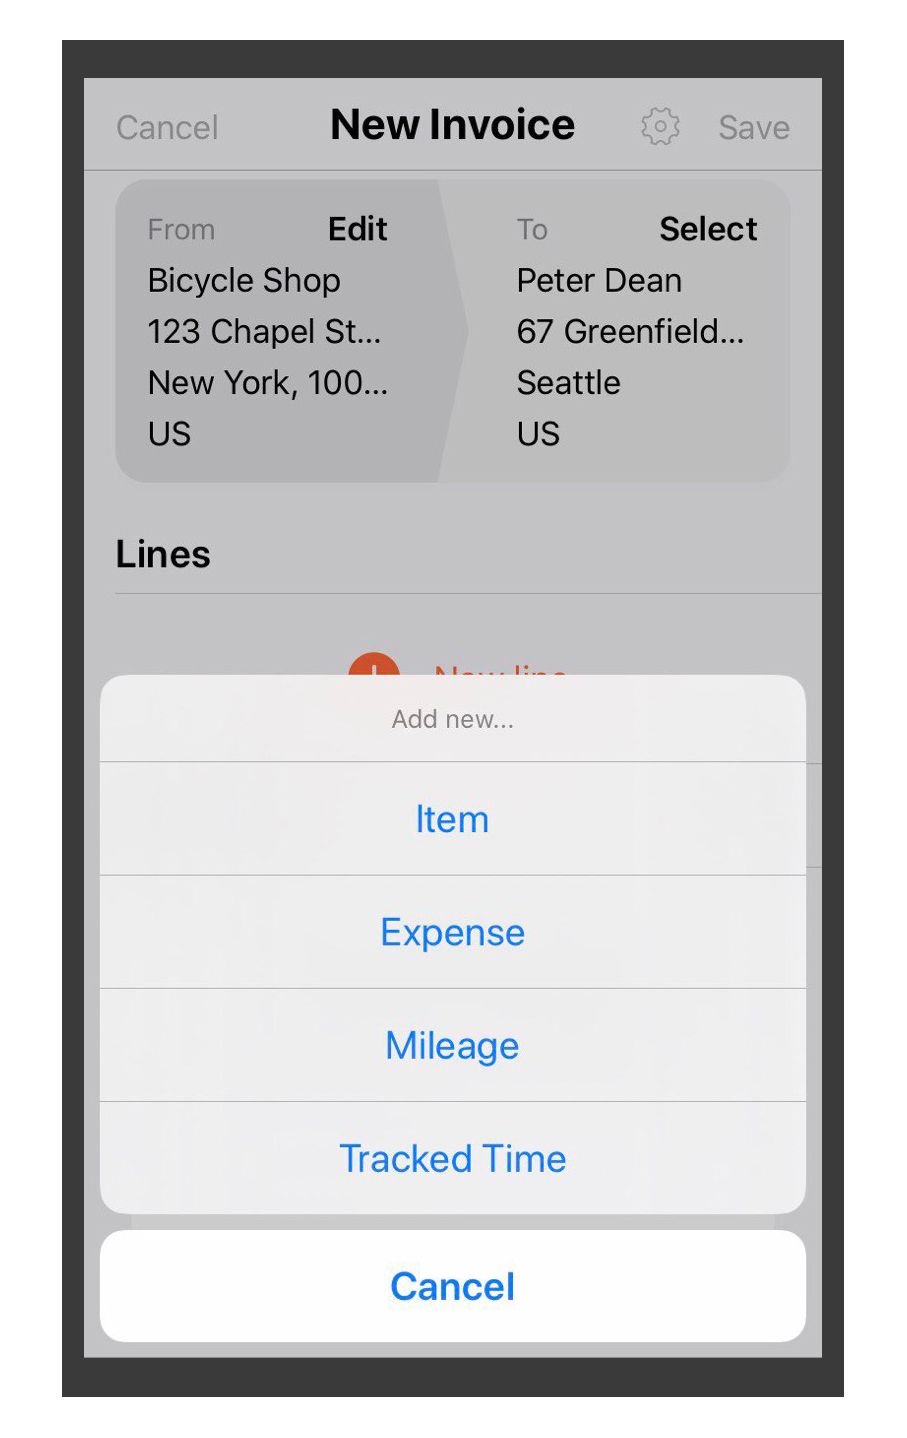
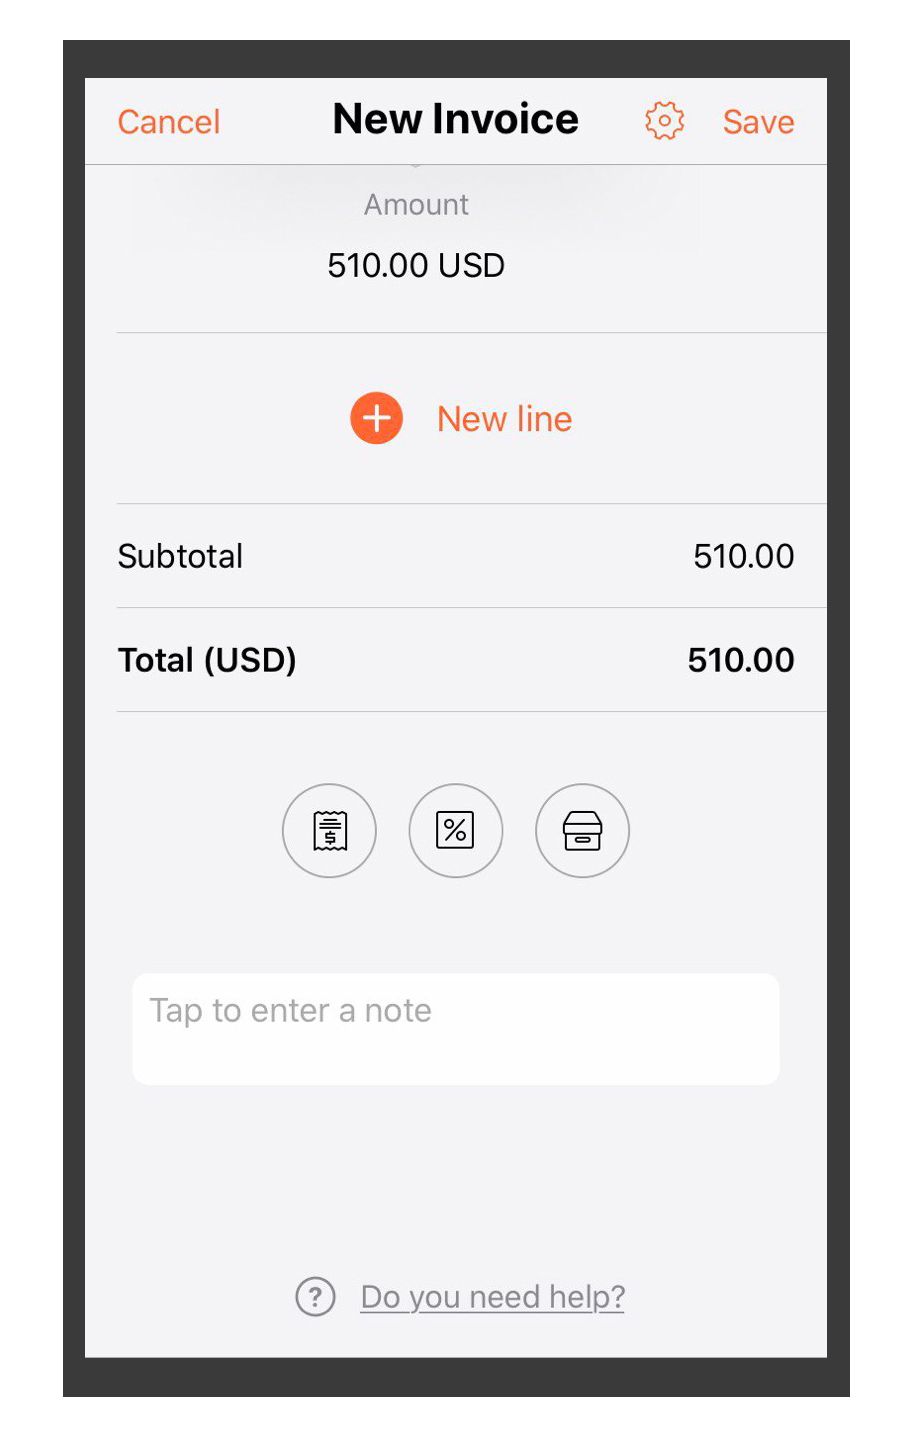
Now it's time to enter the object of the invoice, that is the service(s) or item(s) that you have provided, in our case a mountain bike. To do that, tap on "+ New line".

A menu will appear, in which you need to select the relevant line, in our case "Item".
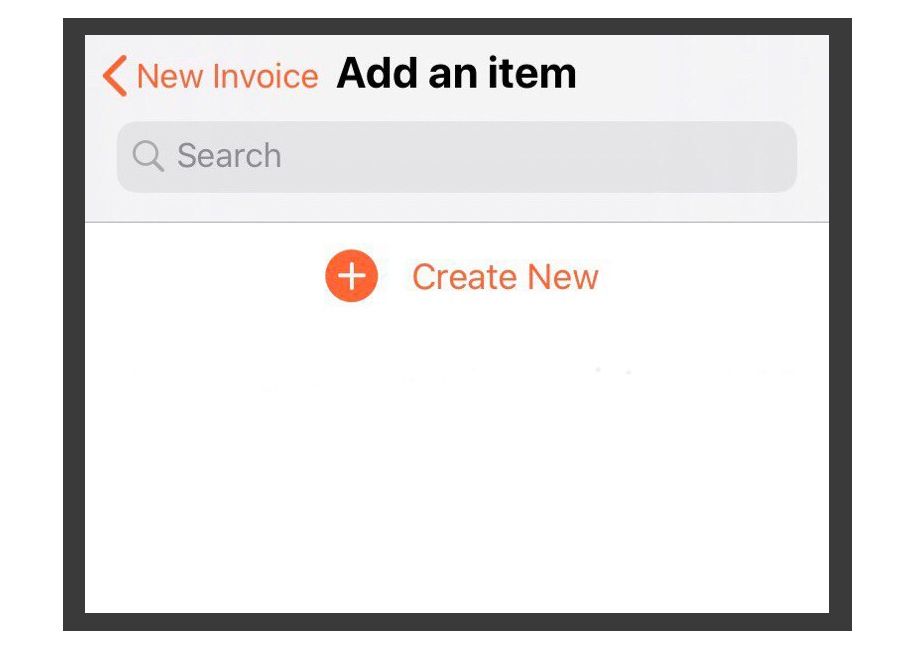
In the new screen, either select the item using the search field (if you've already sold one of those items) or tap "+ Create New".
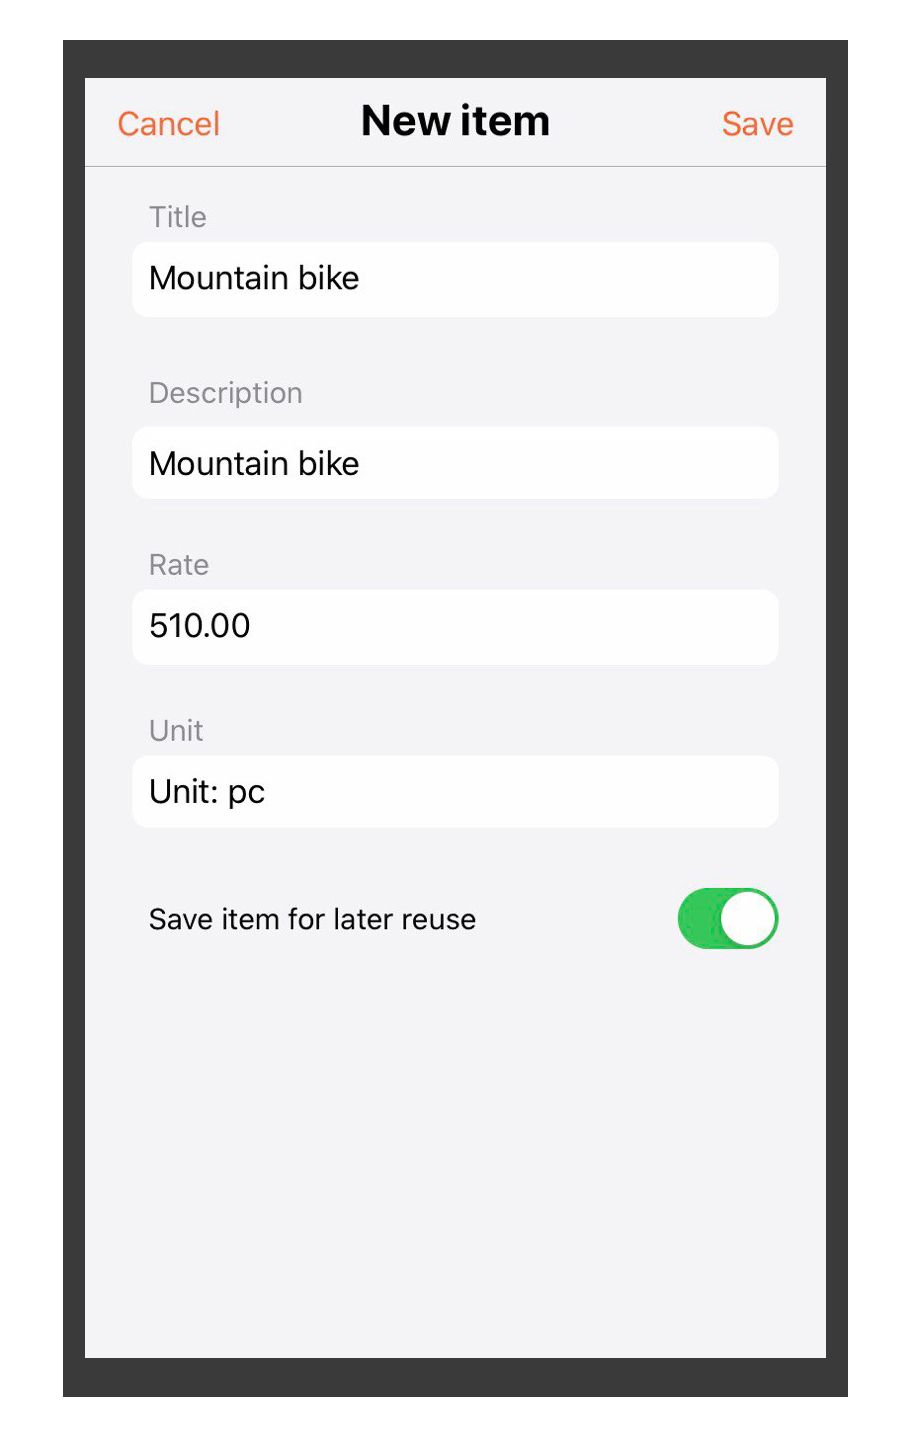
We need to create a new one for our mountain bike.
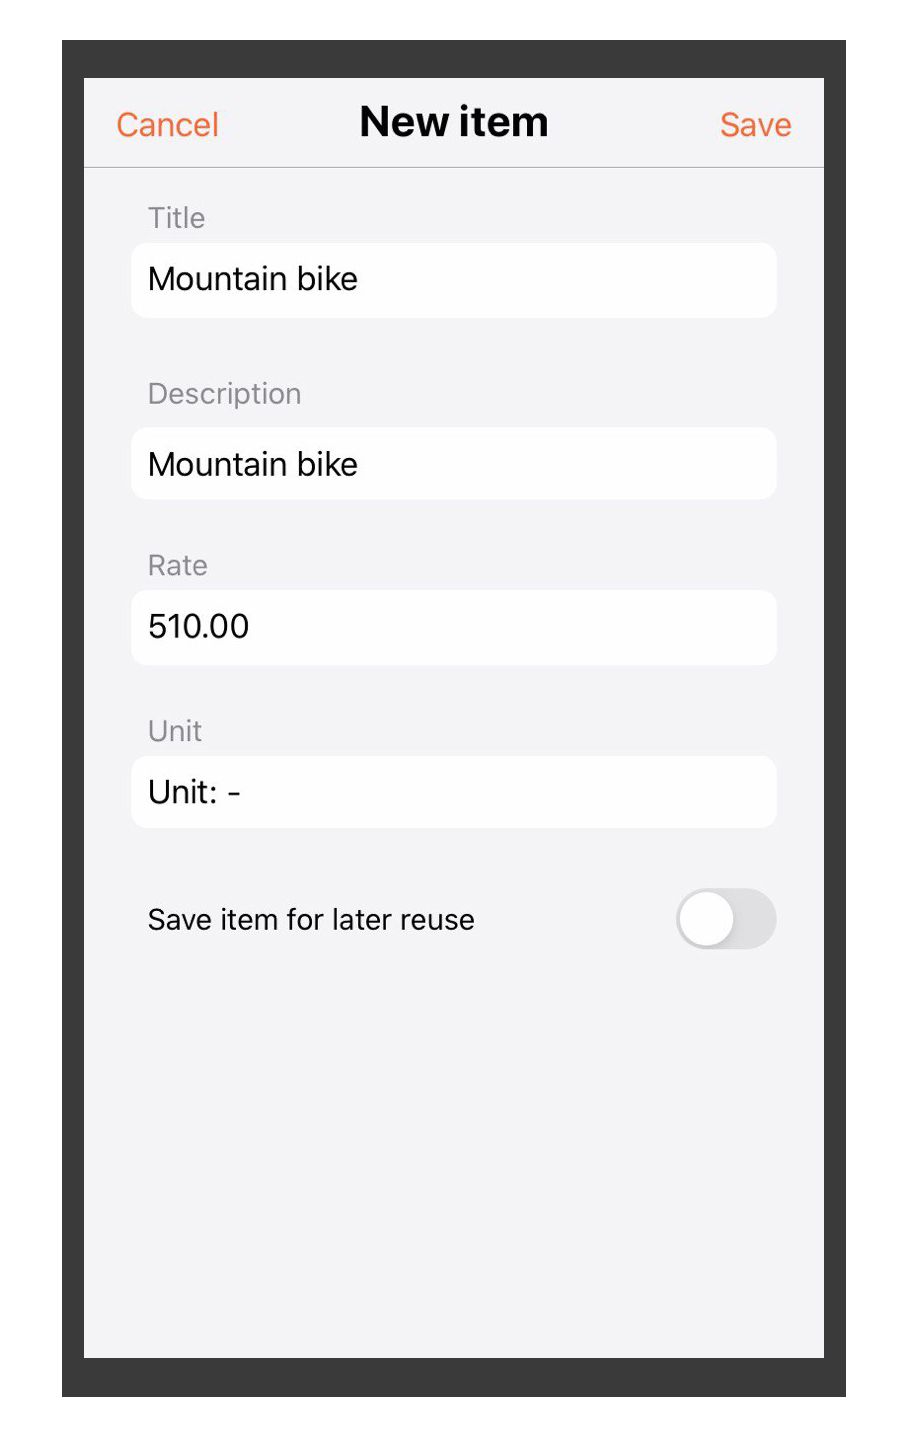
In the "New item" screen fill in the data related to the mountain bike you've sold, such as name (title), description, rate (price) and unit. The price you enter here is the price before any tax, discount or shipping costs, as these will be added at a later step.
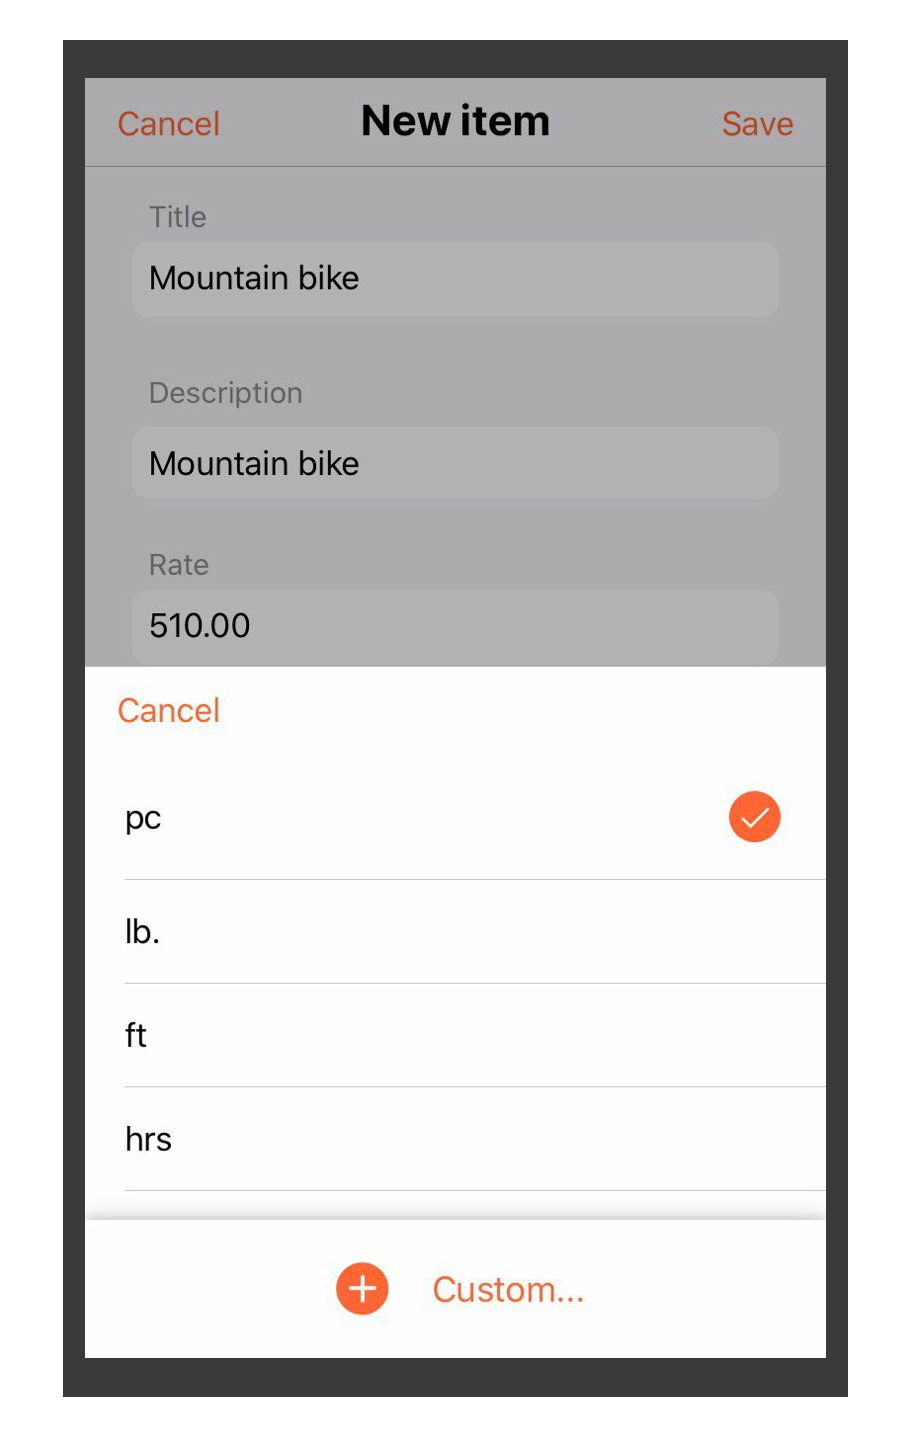
You can choose from more types of units, such as pc (piece), lb. (pounds), ft (feet), hrs (hours) or you can add a custom one. In the case of our mountain bike, we choose "piece" (pc).
Don't forget to save your new item at the end, if you want to use it again at a later point.
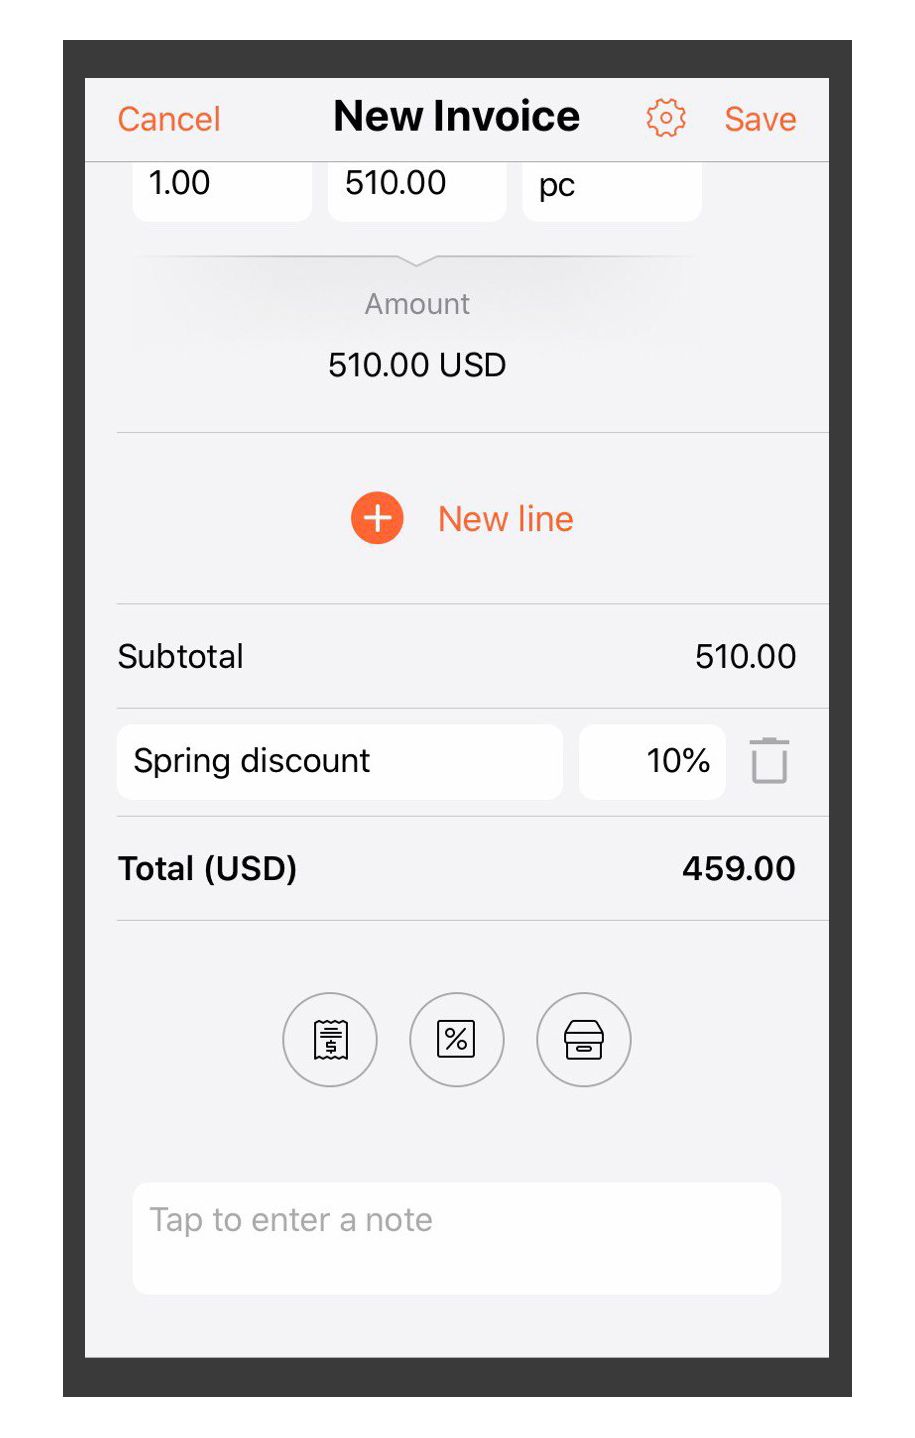
Now it's time to add any tax (for example sales tax), discount you've offered or shipping costs. The three round icons in the center of the screen, under the total are, from left to right: taxes, discounts and shipping costs.
In our case, we need to enter a 10% spring discount for the mountain bike, so we tap the second icon and enter the name of the discount and the percentage, including the percentage sign. As you can see in the screenshot below, the discount will appear right below the subtotal and the total will change.
When you're done, don't forget to save your new invoice by tapping the orange "Save" sign in the upper right corner of the screen.
Your new invoice is now ready!
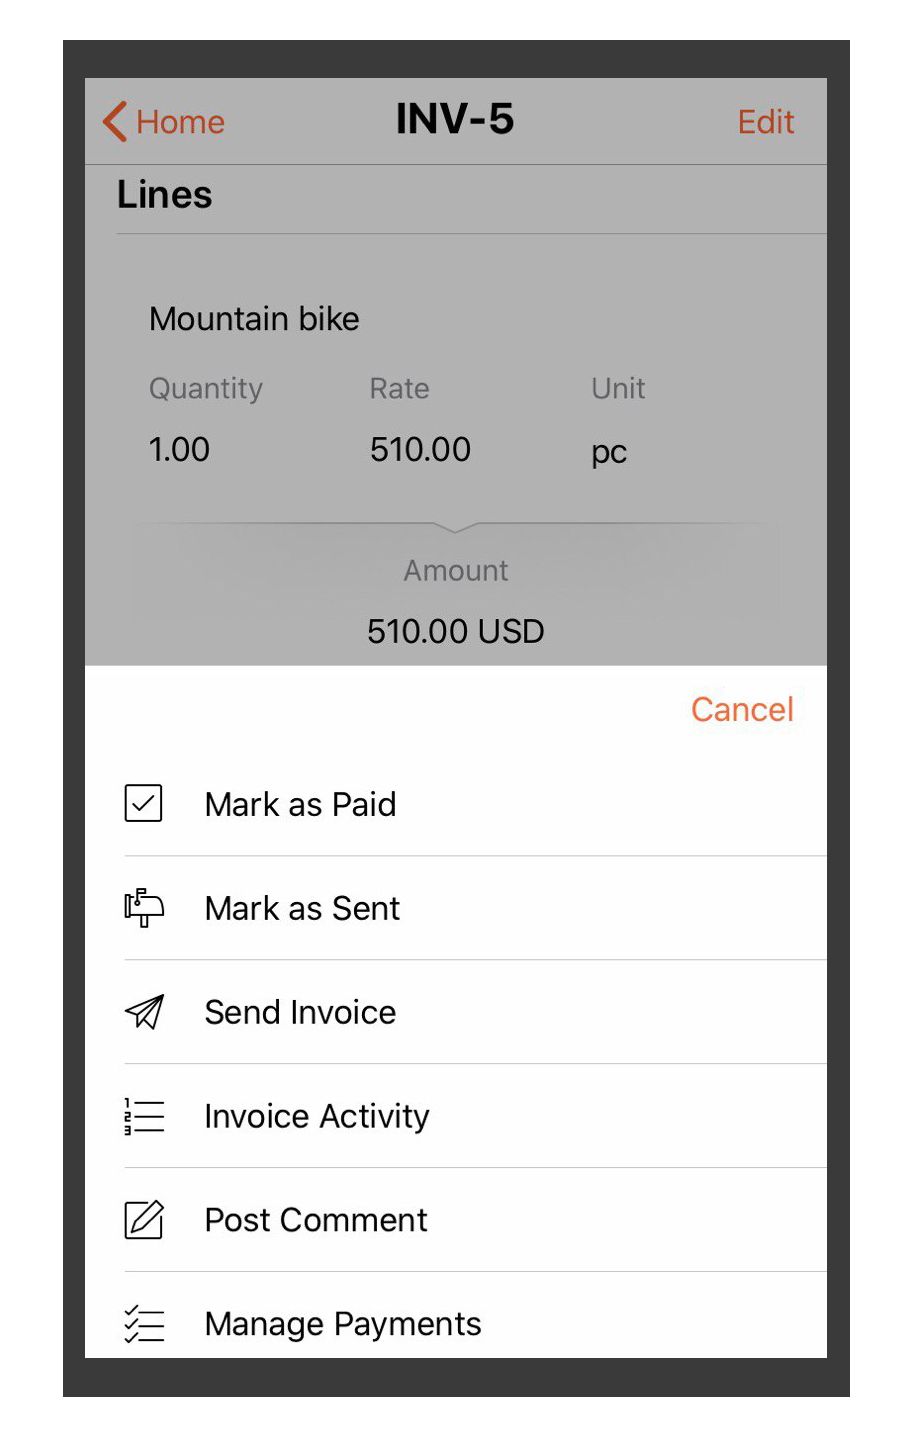
You can download it as a PDF file (tap on "Download PDF" in the bottom left-hand corner of the screen), archive it, or by tapping on "More.." in the bottom right-
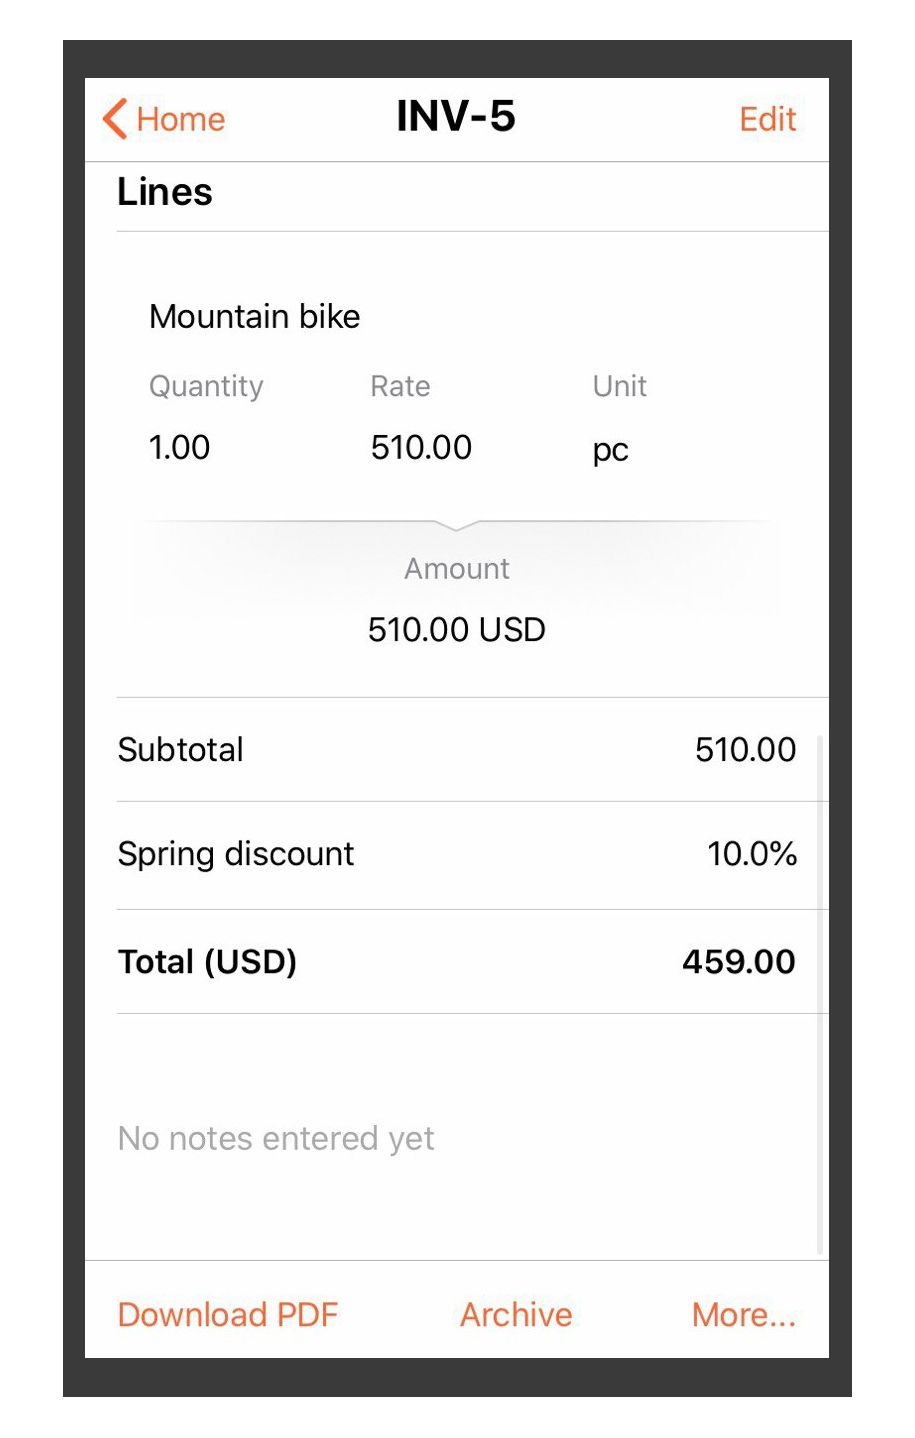
hand corner, you have access to more options, which are quite important. The most important of these are "Send invoice", "Mark as paid" if the invoice has already been paid and "Mark as sent" in case you decide to send it in any other way than through the system.
We hope you found this tutorial useful. If you still have questions, you can find answers in our help center or you can contact our friendly customer service team.